
Monday, January 7, 2019
Go See My Behance
From now on, I will no longer be using Blogger for my portfolio, going to Behance instead. If you're here because you actually want to see my work, you can see my newer projects at https://www.behance.net/condkc9adf7. If you go there, you can see cool stuff like this:
 Thank you!
Friday, May 18, 2018
End of Junior Year Reflection
 So Junior year is almost over now, and that means its time for another blog post. Having animation two hours a day everyday was really cool and helped me really get into and learn more about animation, particularly on the 3-D side. I finished my castle, redoing some stuff, and entered it into e-Magine, where I got third place in my category. Looking at the finished product compared to what I was doing even at the beginning of the year, I'm certainly learning a lot. I've also been playing around with some new techniques, which will hopefully make it into future projects. Things I've learned this year include:
Technical Skills:
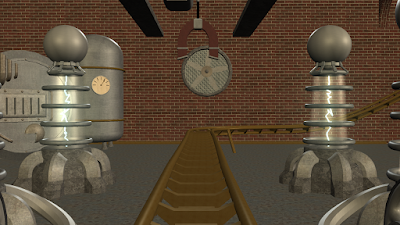
Throughout the year, I've learned how to use many new features in Maya. In the castle alone, I had to figure out particle effects, texturing (beyond just clicking the "do-all-the-work-for-me" button), and various lighting tools. Since then, I found the flow path tool and after playing around with it for a bit, realized that I could make a roller coaster with it. The idea evolved, and I ended up making a full coaster, and for some reason, I decided to make it in VR. This opened me to the "amazing" world of rendering. There were so many things that made this process so hard. First of all, to use the spherical camera, I had to render in Arnold. After having to redo all my lighting, I realized that I couldn't batch render, so it took literally 48 hours on two computers to render each frame in sequence. It looks pretty cool, though, and it introduced me to a whole part of 3-D animation I knew virtually nothing about.
 |
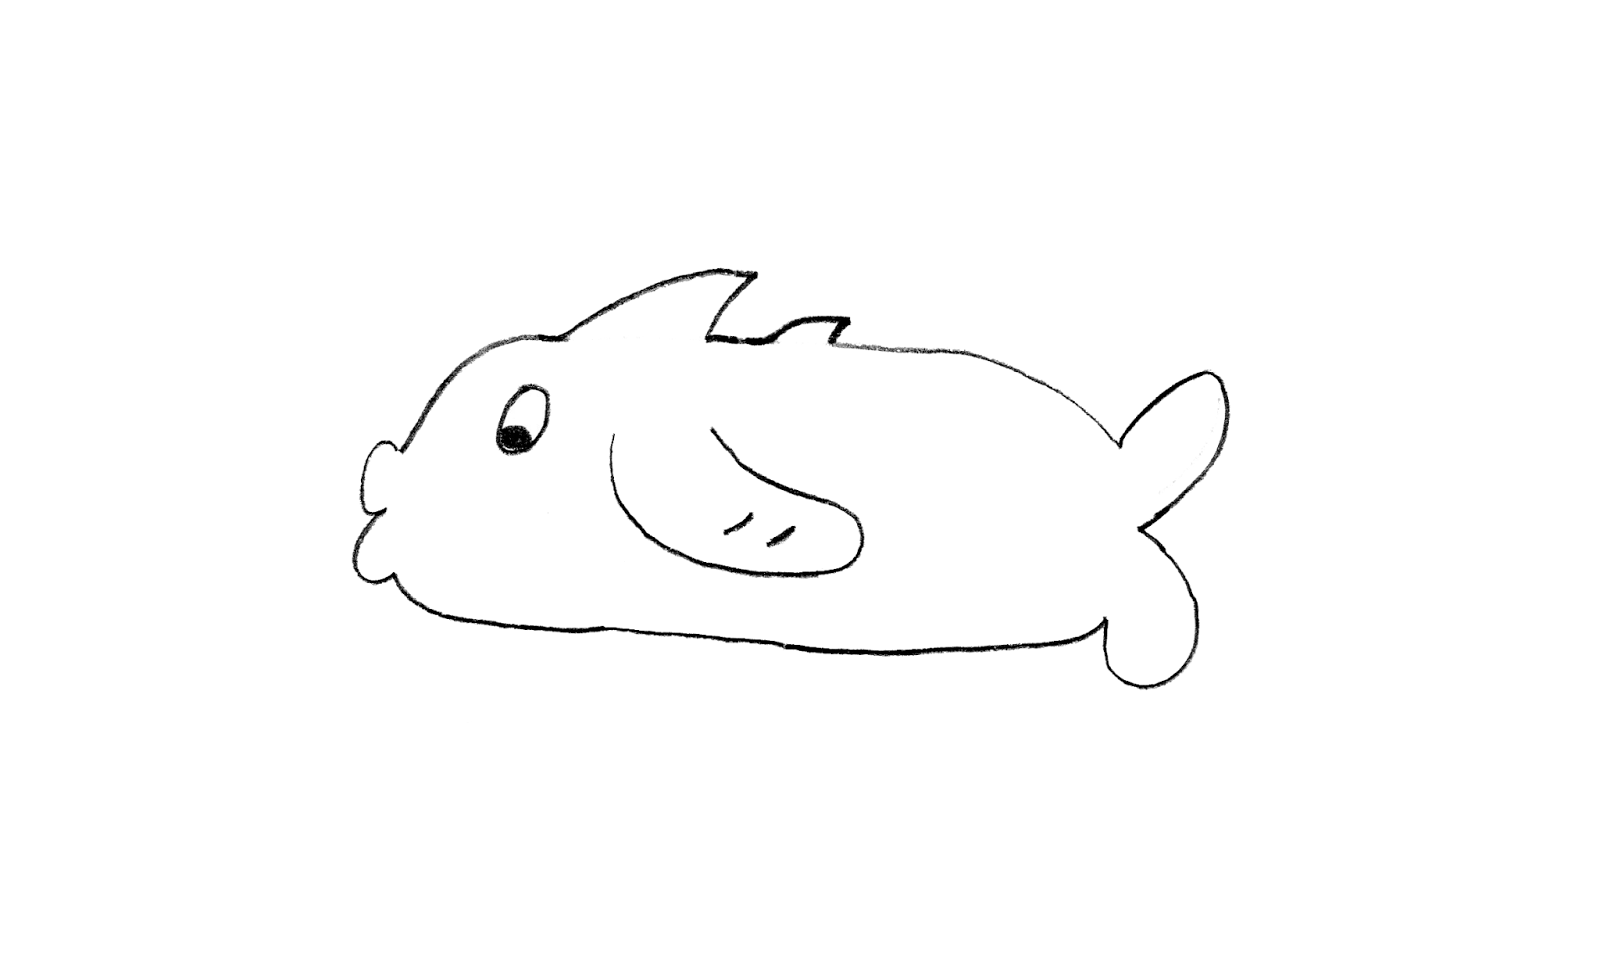
| My Fish, modeled and textured, but never implemented -_- |
Collaboration:
This quarter, I worked with some other people to make a group project: some animated fish meant to teach children how to count. At the beginning, it seemed like it was actually going to turn out good. However, we didn't exactly plan very much, which kind of delayed the project...indefinitely since the seniors are done now. Technically we have the parts complete: all the fully animated models, narration, and a good background. We just didn't ever get to put it together. I guess we all need some better collaboration skills.
Communication:
While we didn't finish, we did a fair amount of communicating in the fish project. Especially in the planning phase, we actually thought it through and had some pretty good ideas. We had it all planned out on who was going to do what and what it was going to be in the end, but as previously mentioned, it didn't turn out like that.
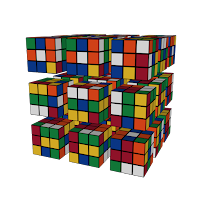 I've never really had any problems with project management. I tend to get everything done on time, in this class anyway. I find animation fun, so its not like doing math homework or something. Actually, because of the time I put into these projects, I've made several models just for fun. The roller coaster is the biggest example, but I've made some other weird things, too: this Rubik's cube made out of Rubik's cubes (Rubik's tesseract), a hypnotic ring of gears, and a couple of optical illusions. Also, my previous statement about getting work done on time may seem to go against the fish project never being finished, but, not naming any names, some people didn't exactly do what they said they would.
Project Management:

Leadership:
There isn't really much of a chance to be a leader in Animation. Maybe we should've had one on the fish project, but we were kind of all co-leaders. I guess you could say I was a leader by example, people tell me that sometimes, but I could definitely get better in this category.
So this year was certainly interesting. I've mentioned it before, but having Animation two hours a day is really a big help when it comes to doing big projects. Looking through all my works on Youtube, I just seem to be getting exponentially better. Hopefully this continues into next year and beyond, learning everything I can along the way.
Last Semester's Reflection: https://goo.gl/WgNmVS
Tuesday, December 19, 2017
First Semester Reflection
Since my last post, I've finished the castle I was working on and I also tried some 2-D stuff, which I really haven't done in over a year, as my short story animation was posted last October. It was kind of a nice change of pace (though I prefer and am much better at 3-D) from all the work I spent on the Castle. Speaking of which...
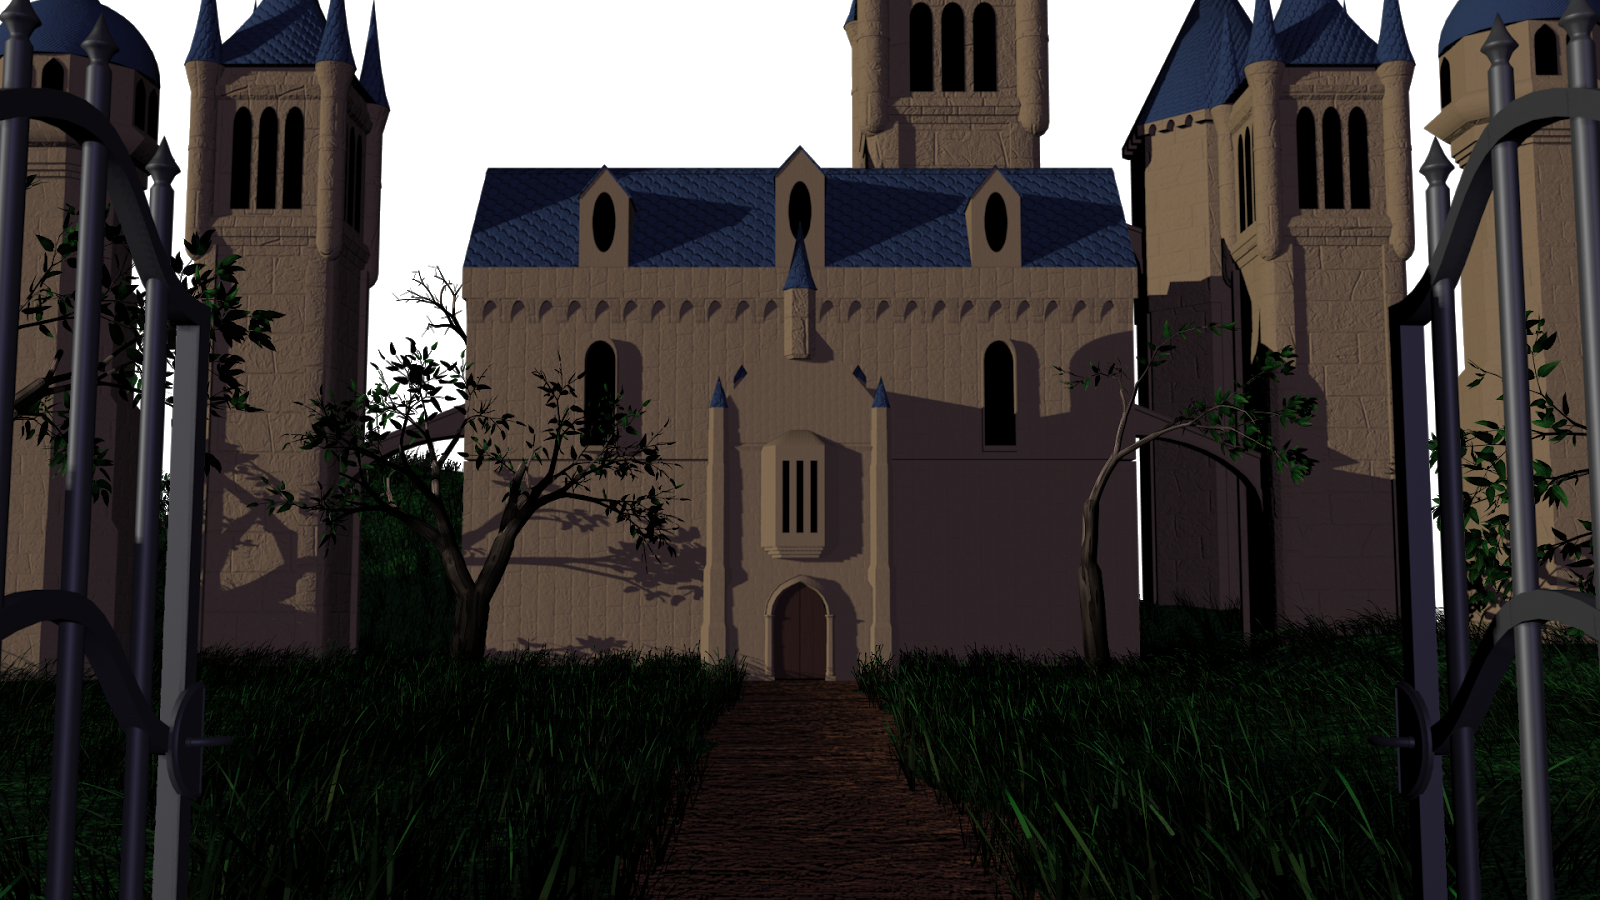
Like I said previously, I finished an early render of the castle exterior, and I think it looks pretty good. I probably say this in like every post I write, but this is the biggest, most complicated project I've done, and probably will stay that way, at least until next year maybe. This was the first time I've used multiple Maya files in a project, which ended up being helpful because it let me just work on certain pieces separately, then arrange them all together. There was one problem, though, when I accidentally made the stone texture be lambert1. Don't do this. It took like hours to redo the UV mapping in a new texture. I got it back eventually, though, and it looks okay. Another thing, which I didn't even realize until much later, is that the moon moves. And the way that my lights are set up, I don't even need a moon; my lights are coming from behind the camera, so the moon makes no sense. I'm currently working on a second version, though, with some upgrades, including grass, higher-quality textures, and no moon. Additionally, I'm also making a second scene using some models I didn't use in the exterior. Hopefully it turns out good; the lights, especially the shadows off the chains, look really cool so far.
As my first semester having Animation two hours a day, this was pretty good. I got a lot done and learned more, too. And even though I probably won't be doing another 2-D animation anytime soon, it was a pretty good experience. I'm still working on the castle, too, and a finished version will likely be finished by the end of spring.
Gothic Castle
 |
| A test render of the second scene |
Rotoscoping Project- Tornado Kick
My second project of the quarter was a bit more out of my comfort zone. I've never been that good at drawing people, so rotoscoping 38 frames seemed a bit intimidating. Thankfully, it ended up being a bit easier than expected, if not really time consuming. Filming was probably my favorite part of the whole thing. I've always wanted to incorporate my Tae Kwon Do into an animation, and this was my chance (though I really want to do Mo-Cap some day☺). Getting the whole thing set up in Photoshop was next, and a bit of a pain. There was a bunch of stuff to do, like making it 15 FPS instead of 30, and setting up the Animation Timeline. When I started drawing, I tried to use a tablet, but I couldn't get used to the really high sensitivity, so I ended up just using keyboard/mouse. Two weeks later, when the actual rotoscoping was done, I colored it, then added a background. On the background, the flags were surprisingly difficult; On the US flag, I think there are only like 41 stars, and the South Korean one was just hard in general. It looks pretty cool, though, and in the video, I put in all the different versions to show the whole progression of my work.
As my first semester having Animation two hours a day, this was pretty good. I got a lot done and learned more, too. And even though I probably won't be doing another 2-D animation anytime soon, it was a pretty good experience. I'm still working on the castle, too, and a finished version will likely be finished by the end of spring.
Monday, October 16, 2017
Quarter 1 Animation
It's junior year, and the mediocre blog posts continue! First quarter of Animation so far was kind of different, but in a good way. I've completed two projects this year, and am currently working on a third. Here are my thoughts and details on all three.

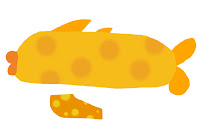 This project started out similar to any of the projects we did last year, a basic model in Maya. For my fish, I was kind of inspired by the shower curtain in my bathroom. I guess looking at it every morning for the last 15 years ingrained it in my mind.
I started out by drawing it on paper, then I scanned it into Maya, and used it as a reference to model. After making it look pretty good, I made a texture for it. Something went weird here, making everything slightly transparent, but other than that, it went pretty well. Next, we rigged the fish, which I didn't find too difficult, since I taught myself how to rig last year. Last, I animated the joints to make the fish swim, adding a little piece of fish food for some reason. I didn't render this one, so the video is just a rough playblast.
 My most recent, and most likely most complicated project yet is my gothic castle. I've always been kind of interested in architecture, so I decided to make a building for my first semester project. The idea to make a gothic castle specifically came from the game Bloodborne, which is heavily inspired by gothic architecture and culture. I was kind of obsessed with the game over the summer, so it was the first thing that came to mind. Recently, I've also been using Hogwarts castle from Harry Potter as a reference.
So far, I've only made a few models for the project, just simple gothic castle-ey stuff. I started with the arches, maybe one of the most pronounced features of gothic architecture. Since then, I've made a few towers, a gate, and am currently making the main hall area.
My plan for this project is to put all the pieces together and then do a camera fly through as if it were a person touring the castle. Depending on how much time I have, I may try to work in some plot portrayed by the environment, but I'm not at that point yet. This project could turn out really cool, and I hope it does. We'll see at Thanksgiving...
Picture Animation
The first project of the year was a simple story made from 30(ish) pictures edited and spaced out with a soundtrack in the background. There isn't a lot to say about this one; I used some of the skills from Video that I learned last year (six shot system and basic framing stuff) to make an animated story.
The Fish Project
 This project started out similar to any of the projects we did last year, a basic model in Maya. For my fish, I was kind of inspired by the shower curtain in my bathroom. I guess looking at it every morning for the last 15 years ingrained it in my mind.
I started out by drawing it on paper, then I scanned it into Maya, and used it as a reference to model. After making it look pretty good, I made a texture for it. Something went weird here, making everything slightly transparent, but other than that, it went pretty well. Next, we rigged the fish, which I didn't find too difficult, since I taught myself how to rig last year. Last, I animated the joints to make the fish swim, adding a little piece of fish food for some reason. I didn't render this one, so the video is just a rough playblast.
Castle Model (work in progress)
 My most recent, and most likely most complicated project yet is my gothic castle. I've always been kind of interested in architecture, so I decided to make a building for my first semester project. The idea to make a gothic castle specifically came from the game Bloodborne, which is heavily inspired by gothic architecture and culture. I was kind of obsessed with the game over the summer, so it was the first thing that came to mind. Recently, I've also been using Hogwarts castle from Harry Potter as a reference.
So far, I've only made a few models for the project, just simple gothic castle-ey stuff. I started with the arches, maybe one of the most pronounced features of gothic architecture. Since then, I've made a few towers, a gate, and am currently making the main hall area.
My plan for this project is to put all the pieces together and then do a camera fly through as if it were a person touring the castle. Depending on how much time I have, I may try to work in some plot portrayed by the environment, but I'm not at that point yet. This project could turn out really cool, and I hope it does. We'll see at Thanksgiving...
Wednesday, May 24, 2017
End of Year Animation Reflection
This year is animation was pretty cool. I learned so much, and made some really neat projects. All of the things I've done here made it one of my favorite classes, not just in this year, but in my entire time in school.
One of the most important and relevant skills in animation is the technical knowledge of the programs. I learned how to do a lot of things in After Effects this year, and even more in Maya; from the basics of just making something move, to more complicated things with Mattes and stuff. I even taught myself how to rig a 3-D character for the final video. I'm definitely not perfect yet, probably wouldn't even be considered great, but that's why I'm continuing on next year.
Aside from the final project, there wasn't a whole lot of collaboration in animation. But on that final project, there was a lot. It kind of felt like I was part of a real movie studio (a really amateur one, anyway), with everyone kind of contributing a different part of the whole project.
That group project was also where communication came in. We all kind of discussed the idea for the story, and later on communicated what everybody was doing so we could get the project done on time. Besides that, this blog is kind of the main communication thing for me. It tells my thoughts on all the projects I've finished and what I learned from them.
Project management was pretty vital for a lot of animation, especially in software that kind of goes crazy on you if you put something in the wrong place. I've always been an organized person, and that really helped this year. While other students' desktops are super cluttered, random png's all over the place, I have mine sorted out pretty good. I have folders and subfolders, and more folders in those. It's actually probably too organized, now that I think about it...
There wasn't really a lot of opportunities for leadership in this class. The only example I can think of is on the group project. I was kind of in charge of a lot of the special effects stuff, so my group members kind of consulted me occasionally. Maybe there will be more leadership stuff in the future, but leadership isn't really my best quality, either.
Sophomore Animation was really fun, and I learned a ton of new skills. Even though I still know very little compared to how much there is, I've gotten a lot better, and plan to get even more so next year.
Tuesday, May 23, 2017
End of Year Video Reflection
This year in Video was pretty good. I learned a lot of stuff, had a lot of fun, and made some cool videos. Even though I'm not continuing video next year, all the skills I've gained should help me into the future anyway.
In terms of technical skills, I started to learn some of the more advanced effects you can do in Premiere. In my most recent project, the short film, I learned some color correction and lighting effects, as well as some audio effects like filtering out wind (sort of).
The skills I probably had to use the most were collaboration and communication. Most of the time, they kind of went together. Throughout all of the second semester projects, I had to work in a team to get videos done. Whether it was knowing what to say in a shot, or even something as simple as telling when the camera was filming, communication was important. This semester was also probably some of the most fun I've had in e-Comm. I have some great memories: filming our music video up on the catwalk, being generally dumb for the Napoleon Dynamite trailer, and making an actual short film. Working with other people was really fun and helpful. Even when things went wrong (messing up a line, wearing the wrong clothes for a scene, or the daily "forgetting to fix the audio settings"), we learned from it, and got better.
Project management has always been somewhat of a natural skill for me. I usually get projects done on time, and I'd say they turn out fine. I do have a habit of getting distracted with most work, but I have an unnatural like for editing, so I usually go for like three hours straight, but I don't even care, because it's fun to me. Time managing while filming is fine, too. There have been many days where we goof around too much and don't get much done, but we've always finished on time.
Leadership is still probably my weakest quality. Most of it is just the fact that I just hate telling other people what to do, but I'm not a good leader anyway. I probably have gotten better, though; I feel a bit more comfortable in leading, at least in video, though it's probably just me being a perfectionist.
Overall, this year was great. I've honestly probably learned more in my eComm classes this year than any of my other classes, except maybe Japanese... but this is an eComm blog, so that doesn't matter. All the projects turned out pretty good, and even when things didn't turn out how I wanted them to, I still learned something.
Monday, May 22, 2017
How to Rig a Basic Figure in Maya
In animation, one of the most important skills for making a 3-D character is rigging: putting a skeleton in a body and making it move right. A lot of the steps are really time consuming and boring, but in the end, taking your time will make it look much better. This guide will show you how to do the very basics of rigging.
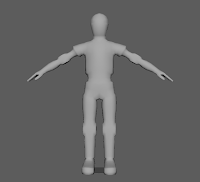
Step 1: Make a Character
Obviously, if you want to animate a character, you need a model to rig. For this tutorial, I'll be using one of the base meshes in Maya, but if you're good at modeling, you can use your own.
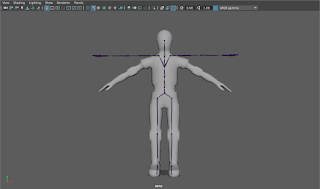
Step 2: Make a Skeleton
To make the body actually move, you need joints to move around. If you're making a more complex character, you'll have to make all the joints individually, but a pre-made human skeleton is already in Maya, under Human IK in the rigging tab. To make the next part easier, turn on Xray Joints, near the top right of the display window.
Step 3: Move the Joints into Place
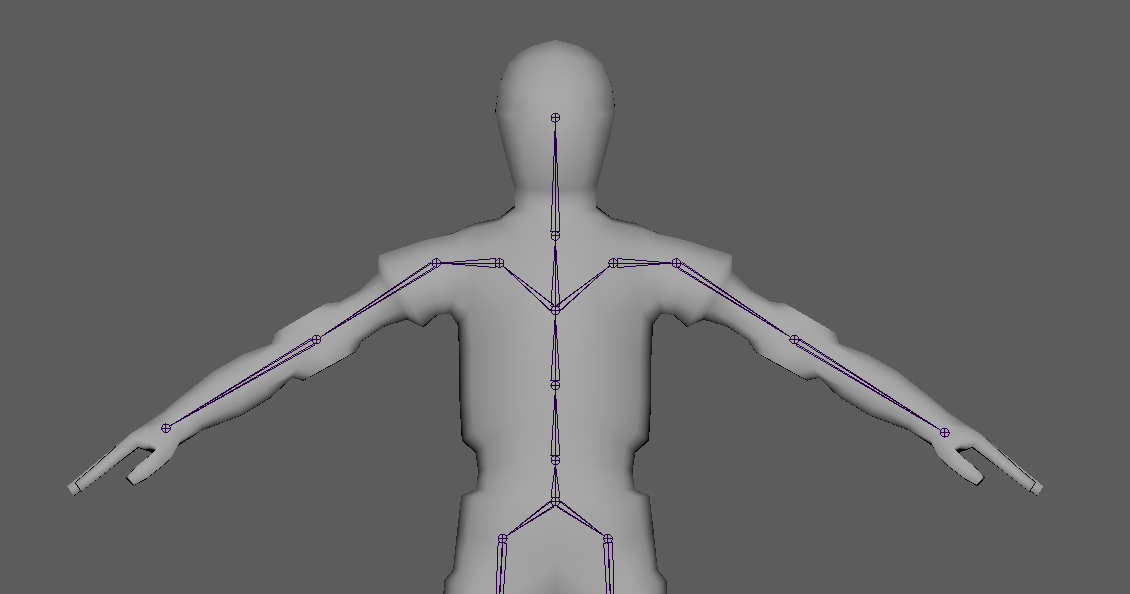
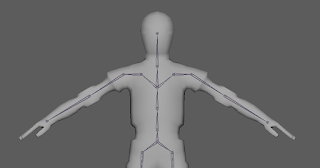 The next, and most important, step is placing the joints. Using the Orthographic views (Top, Side, and Front) will be really useful for this, since the angle of the perspective view may throw off the placement. To move the joints into place, go to the front view, and select each joint to move it into the position where it should approximately be on a human. However, the placement should also be at the center of mass, which will be important later. Selecting multiple joints to move at once can help to keep the symmetry. Once you move all the joints into place, repeat on the other 2 Ortho views to get them into position on all 3 axes. If you notice that my skeleton has no hands, that's because I don't want to take the time to do it, but if you're planning to use the skeleton for a complex animation, you would want to do the same positioning for the hands. When you're sure your finished, select the skeleton (clicking on the middle hip joint selects it all) and the model, and then click Bind Skin.
Step 4: Skin Weighting
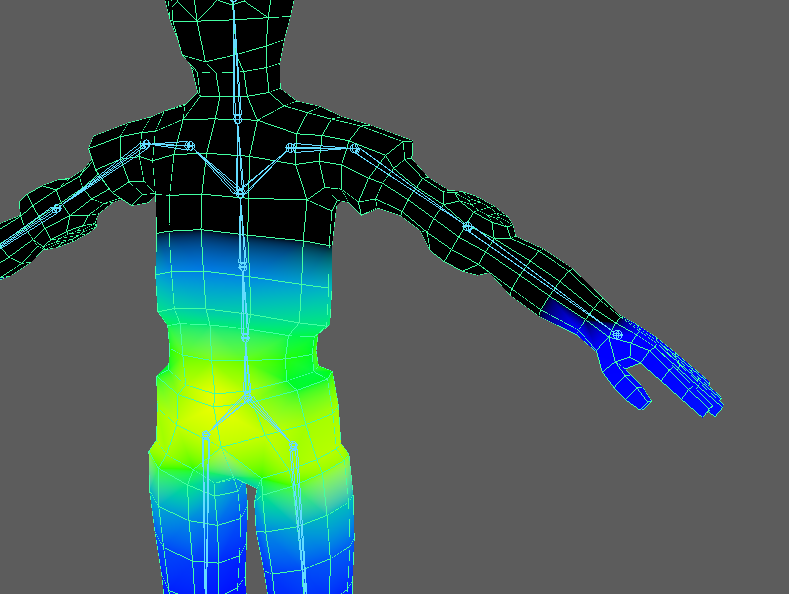
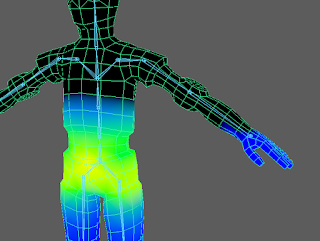 Skin weighting is the most difficult, but a really important part of character animation, is skin weighting. Since there aren't actually bones in the model, you have to tell Maya how much each bone pulls on the skin. If you leave the weights how they are by default, it's not going to look good, like the whole thing is made of rubber or something. To start painting weights, select the "Paint Skin Weights" tool under the Skin menu you used earlier. Selecting this should show a Color Ramp (looks like an infrared camera). If it doesn't, you can enable it in the gradient tab of the tool settings. To do a very simple weighting job, set the value to 0 and the paint operation to replace. Then, Select the joint you want to weight paint, and click Select Geometry. Now you can paint all the areas that shouldn't be affected until they appear black (signifying no pull on that area). One area that you should remove on the hips, for example, is on the hands. Other important areas are the foot opposite to the one of the selected joint, and the same thing with fingers (if you have joints in them). To check if your weighting is doing fine, move a joint around and see if it looks natural. To make it look more professional, you would want to add more weight to areas, but for the purposes of this tutorial, just removing weights should be sufficient.
Now if you move your joints around in positions a human could potentially do, they should look much better. If you want, you now have a model you can use to do some animations.

Step 1: Make a Character
Obviously, if you want to animate a character, you need a model to rig. For this tutorial, I'll be using one of the base meshes in Maya, but if you're good at modeling, you can use your own.
Step 2: Make a Skeleton
To make the body actually move, you need joints to move around. If you're making a more complex character, you'll have to make all the joints individually, but a pre-made human skeleton is already in Maya, under Human IK in the rigging tab. To make the next part easier, turn on Xray Joints, near the top right of the display window.

Step 3: Move the Joints into Place
 The next, and most important, step is placing the joints. Using the Orthographic views (Top, Side, and Front) will be really useful for this, since the angle of the perspective view may throw off the placement. To move the joints into place, go to the front view, and select each joint to move it into the position where it should approximately be on a human. However, the placement should also be at the center of mass, which will be important later. Selecting multiple joints to move at once can help to keep the symmetry. Once you move all the joints into place, repeat on the other 2 Ortho views to get them into position on all 3 axes. If you notice that my skeleton has no hands, that's because I don't want to take the time to do it, but if you're planning to use the skeleton for a complex animation, you would want to do the same positioning for the hands. When you're sure your finished, select the skeleton (clicking on the middle hip joint selects it all) and the model, and then click Bind Skin.
Step 4: Skin Weighting
 Skin weighting is the most difficult, but a really important part of character animation, is skin weighting. Since there aren't actually bones in the model, you have to tell Maya how much each bone pulls on the skin. If you leave the weights how they are by default, it's not going to look good, like the whole thing is made of rubber or something. To start painting weights, select the "Paint Skin Weights" tool under the Skin menu you used earlier. Selecting this should show a Color Ramp (looks like an infrared camera). If it doesn't, you can enable it in the gradient tab of the tool settings. To do a very simple weighting job, set the value to 0 and the paint operation to replace. Then, Select the joint you want to weight paint, and click Select Geometry. Now you can paint all the areas that shouldn't be affected until they appear black (signifying no pull on that area). One area that you should remove on the hips, for example, is on the hands. Other important areas are the foot opposite to the one of the selected joint, and the same thing with fingers (if you have joints in them). To check if your weighting is doing fine, move a joint around and see if it looks natural. To make it look more professional, you would want to add more weight to areas, but for the purposes of this tutorial, just removing weights should be sufficient.
Now if you move your joints around in positions a human could potentially do, they should look much better. If you want, you now have a model you can use to do some animations.
Subscribe to:
Posts (Atom)